In this article we are going to show you how to install Strukturoc’s 20 gauge steel wall panels. Please note that all project specifications and building codes vary, so use this as a general guide.
Watch the installation video:
Step 1 – Measure and cut your window and door trim pieces.
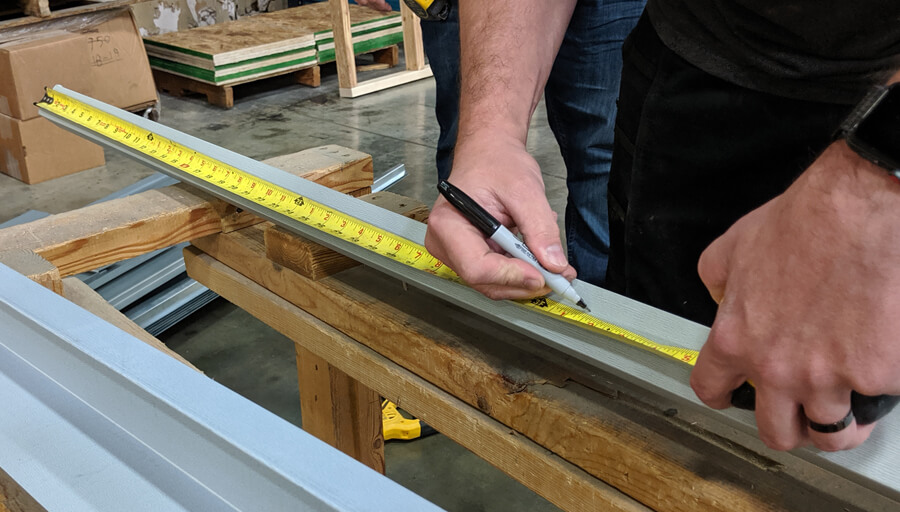
You will start by measuring and cutting your window and door trim pieces. Throughout this tutorial we will recommend checking your cut pieces against the structure you are working on. Do this to ensure a correct fit before you fasten it with screws. Also mark and cut your window and door J trim with proper overlaps to direct water away from the structure. Make sure the overlapping trim has a snug fit before securing it to the frame. Follow these same steps with your drip or cap trim on the top of all windows and doors. Following these steps, finish all window, door, and opening trim installation.
Step 2 – Install base trim and hat channel.
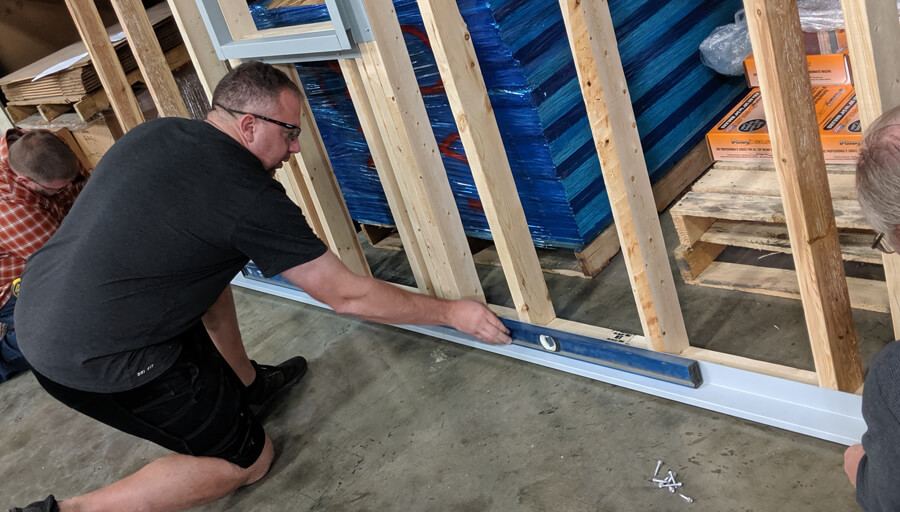
The next step is to install your base trim to the structure. It’s very important to measure and make sure the base trim is fully level before securing it. Should your project require hat channel, this would overlap the base trim.
NOTE: When securing pieces to the structure it will often generate small metal shards. Please take the time to blow or sweep these off any metal surface to prevent rust from forming.
Finish measuring, cutting, and fastening the hat channel to your frame according to your job specifications. This includes properly sizing and cutting around all windows and doors. Continue to check that the hat channel is sized properly, level, and securely fastened as this serves as the foundation of your steel wall panels.
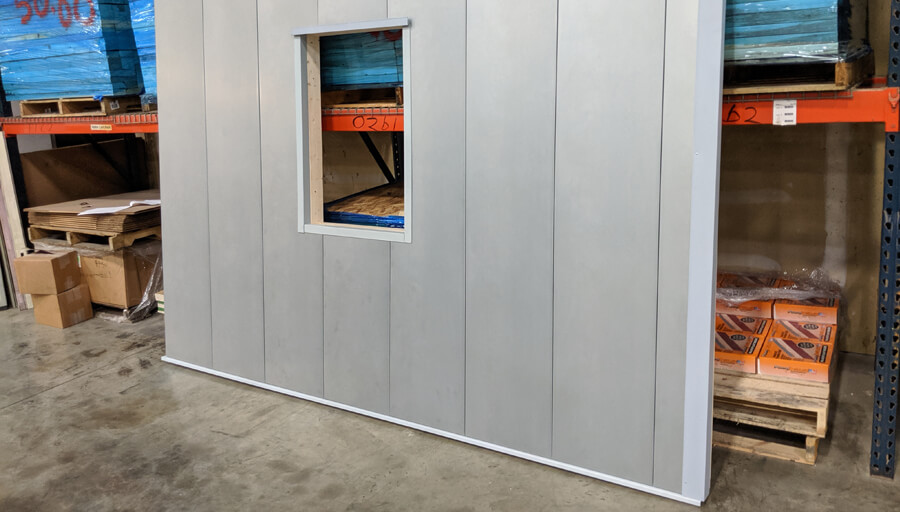
Step 3 – Install steel wall panels
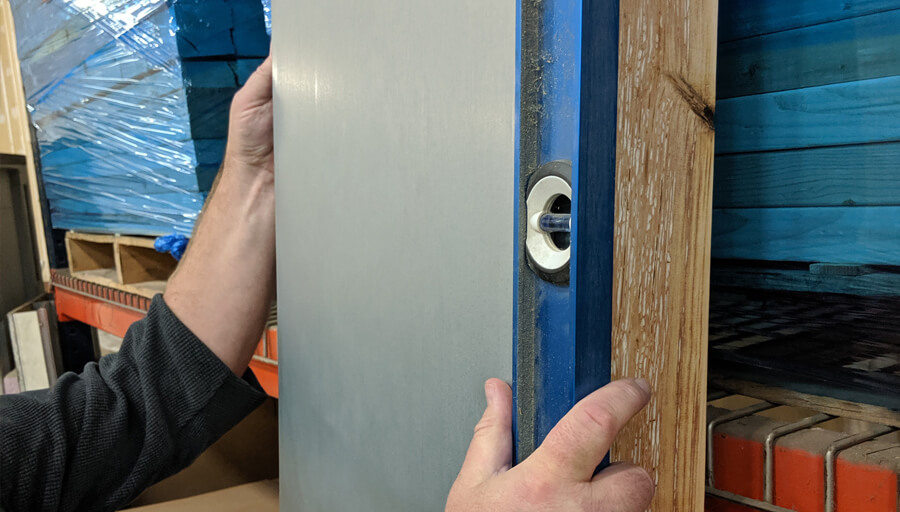
Now that we have all of the trim and hat channel in place, it’s time to begin installing our wall panels. The first wall panel must be plumb, level, and square as it serves as the cornerstone for all the other panels on your elevation. Once the first panel is securely fastened on both edges you can begin to install additional panels. These should slide easily into one another via their tongue and groove design.
To ensure equal spacing of all wall panels, please use the provided panel spacer. We recommend using the spacer opposite of every screw you use to fasten the panel to the frame.
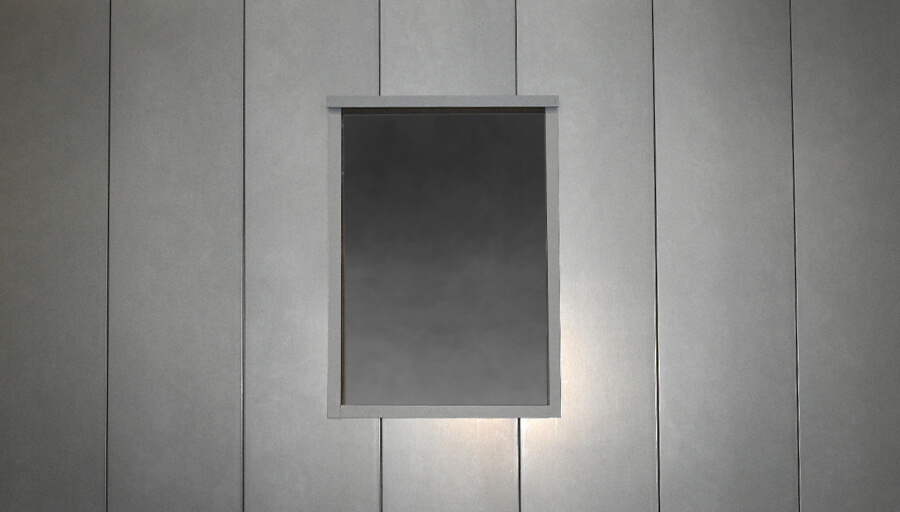
Install support flashing around all windows and doors. This flashing is designed to hold the custom cut steel wall panels flush to the trim around your windows and doors.
Measure and cut your window and door openings out of the steel panels. Just a reminder to take notice of any metal shards that are landing on the wall panels during your cuts. Please take the time to properly remove these before proceeding. Fit the custom cut panels around your windows and doors. Test that they have a snug fit before fastening them to the structure.
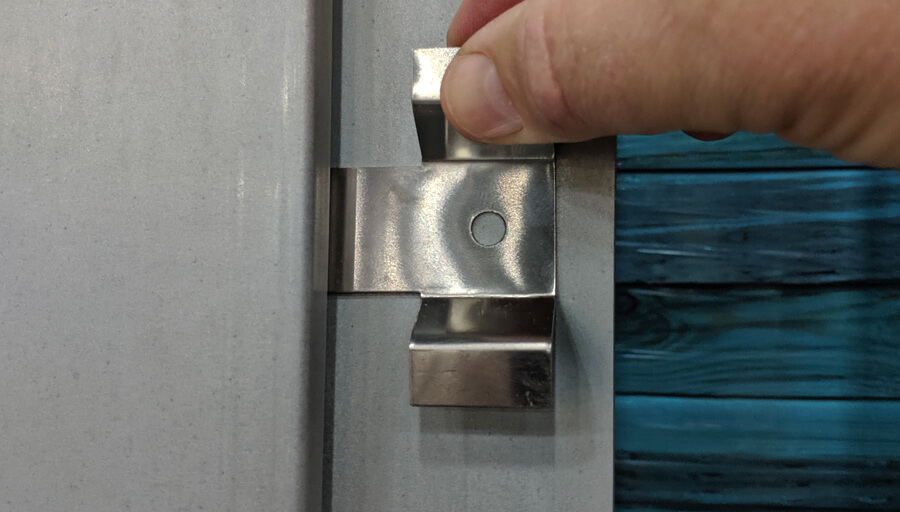
Locking clips can be used for panels that are installed in high wind areas. Locking clips are easily attached before the tongue and groove connection and will prevent panels from separating during strong winds.
The final wall panel on an elevation will typically have to be cut to size. Pre-drill and use rivets to attach the edge of the wall panel to the frame. Also pre-drill and use rivets to attach the corner trim. This creates a great looking finished edge.
Finish the wall be sealing all corners and edges around your windows and doors. When properly installed, Stukturoc steel wall panels provide a durable, long-lasting, and visually appealing facade to any building.